How to Create and Edit Dynamic Forms (Entity Types & Fields)
Build custom forms — called entity types — to capture any information your organisation needs, from incident reports to vehicle checks.
Teiro lets you build custom forms — called entity types — to capture any kind of information your organisation needs to track. Whether that's an incident report, a coffee break log, a vehicle check, or a site induction, you can define exactly what fields appear and who can fill them in.
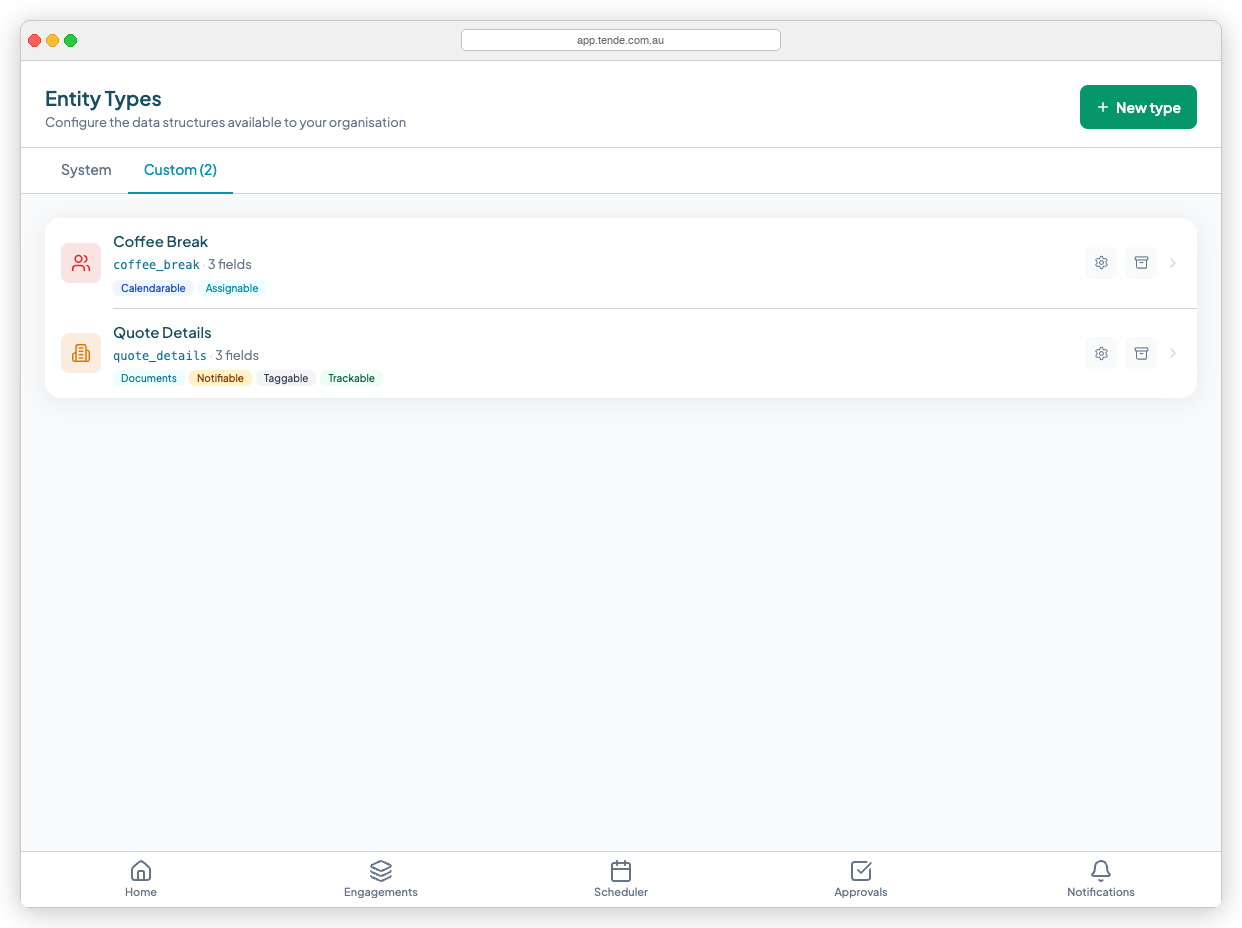
What is an entity type?
An entity type is a custom form template. Once you create one, your team can submit records based on it — each submission is a single entity record. Think of the entity type as the blank form, and each record as a filled-in copy.
Examples of entity types organisations create in Teiro:
- Incident Report
- Coffee Break
- Vehicle Pre-Start Check
- Client Home Visit
- Support Session Note
Creating a new entity type
- 1.From the main menu, go to Settings > Entity Types.
- 2.Select Add entity type.
- 3.Enter a Name for your form (e.g. "Incident Report").
- 4.Optionally add a Description to explain what this form is for.
- 5.Select Save to create the entity type.
Your new entity type will appear in the list. It has no fields yet — you'll add those next.
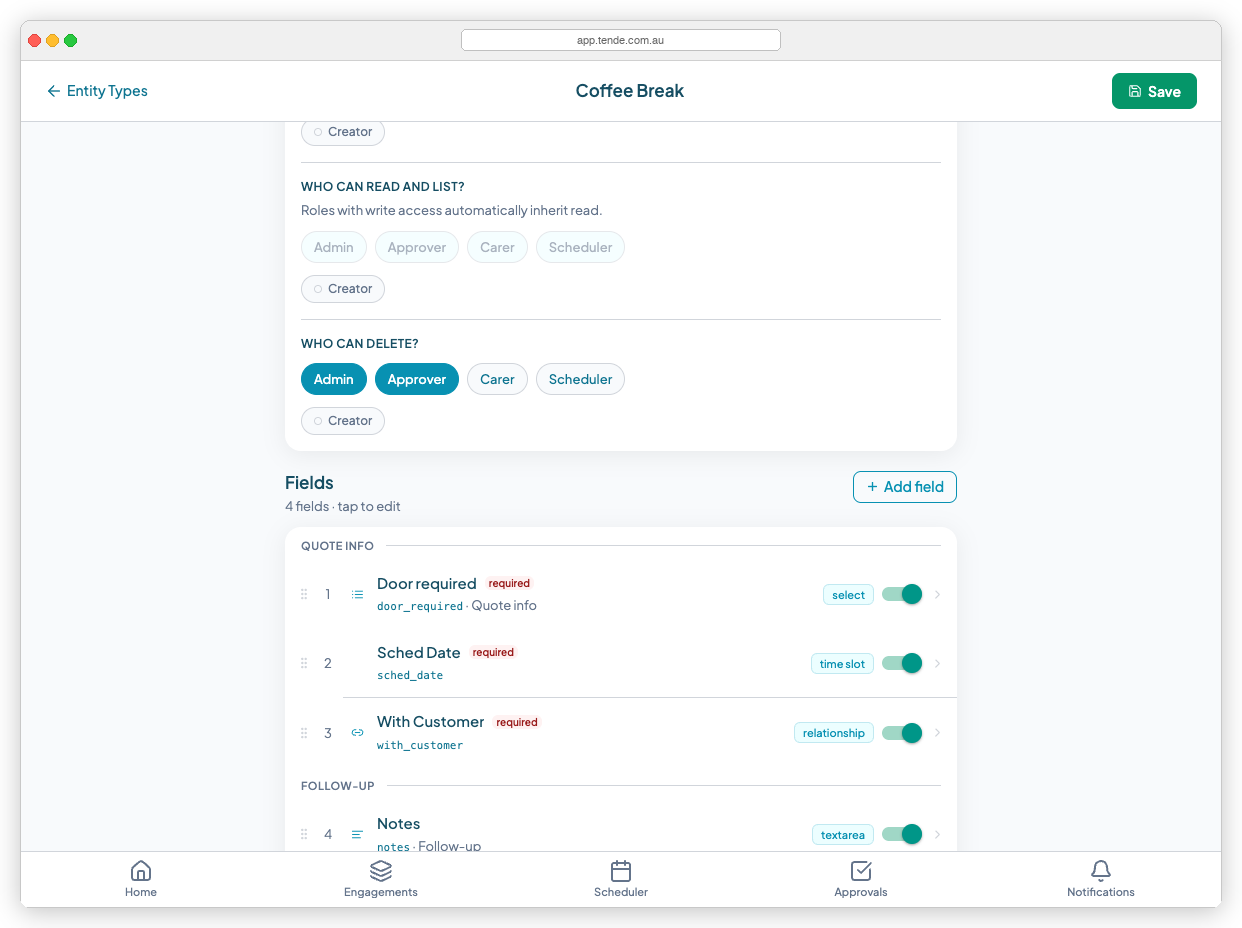
Adding fields to your form
Fields are the individual questions or data points on your form. Teiro supports several field types to suit different kinds of information.
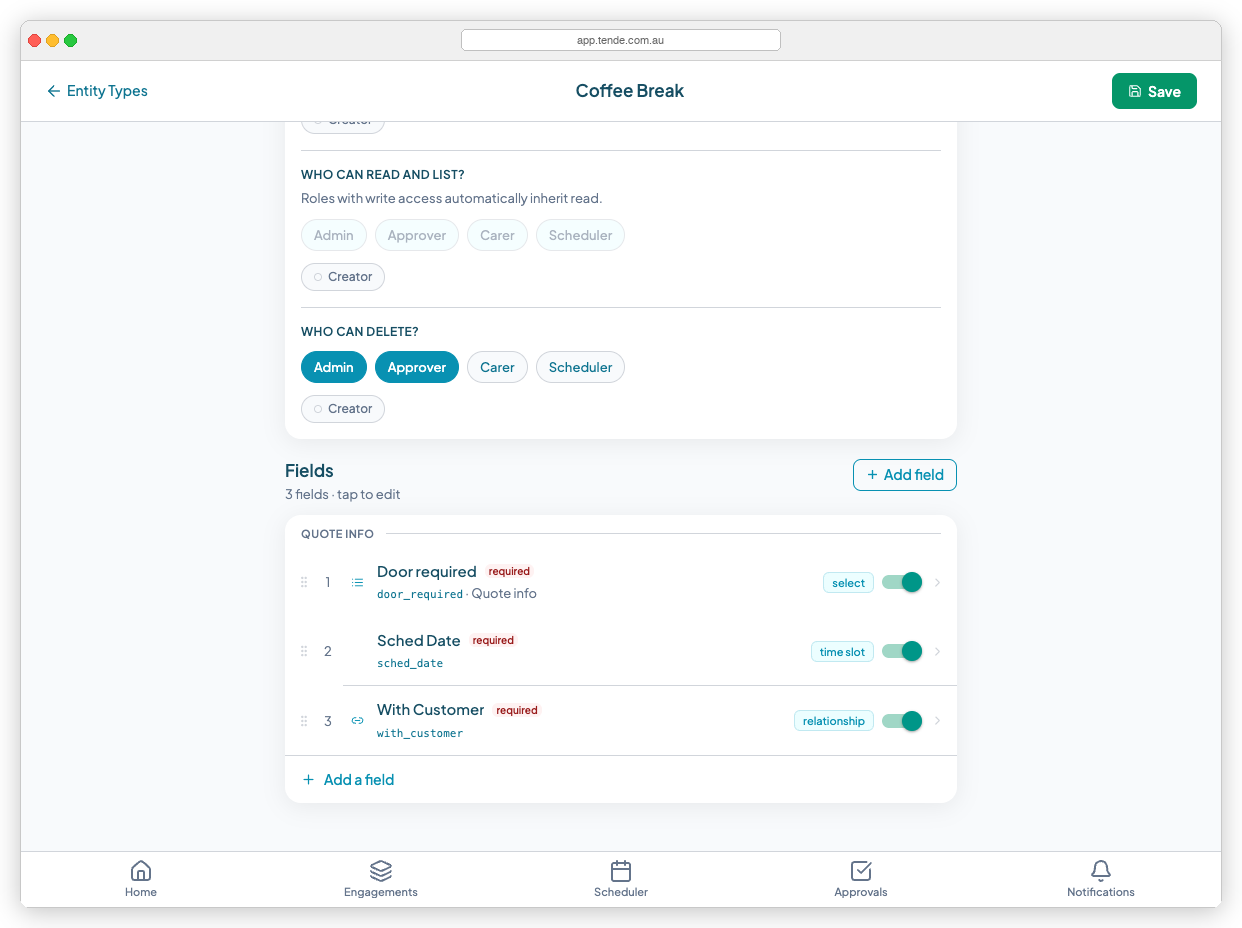
To add a field:
- 1.Open your entity type from the list.
- 2.Select Add field.
- 3.Choose a field type (see the list below).
- 4.Enter a Label — the question or prompt your team will see (e.g. "What happened?").
- 5.The Field key is set automatically from the label. You can edit it, but it must be unique and contain no spaces.
- 6.Mark the field as Required if a record cannot be submitted without it.
- 7.Select Save field.
Field types
| Field type | Use it when you need to capture... |
|---|---|
| Text | A short written answer (name, location, brief note) |
| Long text | A detailed written response or description |
| Number | A numeric value (duration in minutes, quantity, rating) |
| Date | A calendar date |
| Dropdown | One option from a defined list (e.g. severity: Low / Medium / High) |
| Checkbox | A yes/no or true/false value |
| Linked record | A reference to another record in Teiro (e.g. link to a client) |
| File upload | A photo, PDF, or other attachment |
Organising fields with sections
Sections are collapsible groupings you can add to longer forms. For example, an Incident Report might have sections for "Incident Details", "Persons Involved", and "Follow-up Actions".
To add a section:
- 1.Open the entity type.
- 2.Select Add section.
- 3.Enter a Section name.
- 4.Drag fields into the section, or add new fields directly within it.
What "required" means
Marking a field as Required means a record cannot be submitted without completing it. Use required fields for information that is always essential — for example, the date and location of an incident.
Tips
- Keep forms short. Staff complete forms faster and more accurately with fewer fields.
- Test before rolling out. Create a test record yourself before asking your team to use a new form.
- Field keys are used in exports. The field key becomes the column header in exported spreadsheets. Choose clear, readable keys.
Related articles
How to Allocate Dynamic Events to Users on the Roster
Create records of custom entity types — like coffee breaks or vehicle checks — and place them on the scheduler roster against a specific carer.
Setting Permissions for Custom Entity Types in Teiro
Control who can create, view, and delete records for each custom entity type — including niche roles with very specific access.
Changing Terminology to Suit Your Business in Teiro
Rename labels throughout Teiro — change "Customer" to "Participant", "Booking" to "Visit", or any other term to match your organisation's language.