How to Do Your First Billing Run in Teiro
A step-by-step walkthrough for NDIS providers setting up billing in Teiro for the first time -- from service agreements to claim-ready line items to your first NDIA payment request CSV.
Before you start: what needs to be set up
Before you create your first billing run, three things must be in place for each participant you intend to bill.
Participant records with NDIS numbers. Every billable participant needs a record in Teiro with their NDIS participant number. NDIA uses this number to identify the participant in the bulk payment request file. Without it, the export will not include that participant's lines.
Management type set per participant. Each participant record must have their funding management type specified: agency managed, plan-managed, or self-managed. This determines where the billing output goes -- BPR CSV for agency managed, invoice to the plan manager for plan-managed, invoice to the participant for self-managed. If a participant has mixed management (different support categories funded through different types), this is configured at the service agreement line level.
Active service agreements per participant. Each participant needs at least one active service agreement covering the support categories you are delivering. The SA specifies the activity types, the agreed rates, and the budget caps. Shifts delivered outside the SA coverage dates or for support categories not listed in the SA will be held before submission.
Once these three things are in place for a participant, their verified shifts can move into a billing run.
What you will do
A Teiro billing run follows eight steps: set up service agreements, complete and verify shifts, create the billing run, resolve any held lines, group lines by funding recipient, send invoices to plan managers and self-managed participants, export the NDIA bulk payment request CSV for agency managed lines, and reconcile the payment response file when NDIA returns it. Most of these steps are review and decision-making, not data entry -- the shift data flows from delivery into the billing run automatically.
Step 1: Set up service agreements
In Teiro, service agreements live on the participant's record under the Billing tab. To create a new SA:
- 1.Open the participant record
- 2.Go to Billing, then Service Agreements
- 3.Add a new agreement, set the start and end dates, and choose the management type
- 4.Add line items for each support category you will deliver. Each line item needs: the NDIS support item code, the agreed unit rate, and optionally a budget cap
The agreed rate on each line item should not exceed the current NDIS Pricing Arrangements and Price Limits (PAPL) cap for that support item. If it does, Teiro automatically caps the rate to the Pricing Arrangements maximum at billing time and bills at that capped rate -- NDIA will not pay above the cap regardless. It is better to catch this discrepancy when setting up the SA.
For plan-managed participants, add the plan manager's name and email address to the SA. This is where the invoice will be sent.
For self-managed participants, ensure there is a valid email address on the participant record. Without one, the invoice cannot be sent.
Step 2: Complete and verify shifts
Billing runs are built from verified shifts. A shift must go through two stages before it appears in a billing run:
Completion. The worker checks out of the shift via the mobile app or a coordinator marks it complete. Check-out generates the attendance evidence record. A shift with no check-out has no attendance evidence and will be held at billing time.
Verification. A coordinator or billing officer reviews the completed shift and marks it verified. Verification confirms that the service was delivered as recorded and that the billing details are correct. Only verified shifts appear in billing runs.
If a shift was marked complete but not yet verified, it will not appear in your billing run. Go to the Shifts screen, filter by "Completed -- awaiting verification", and verify the shifts before creating the run.
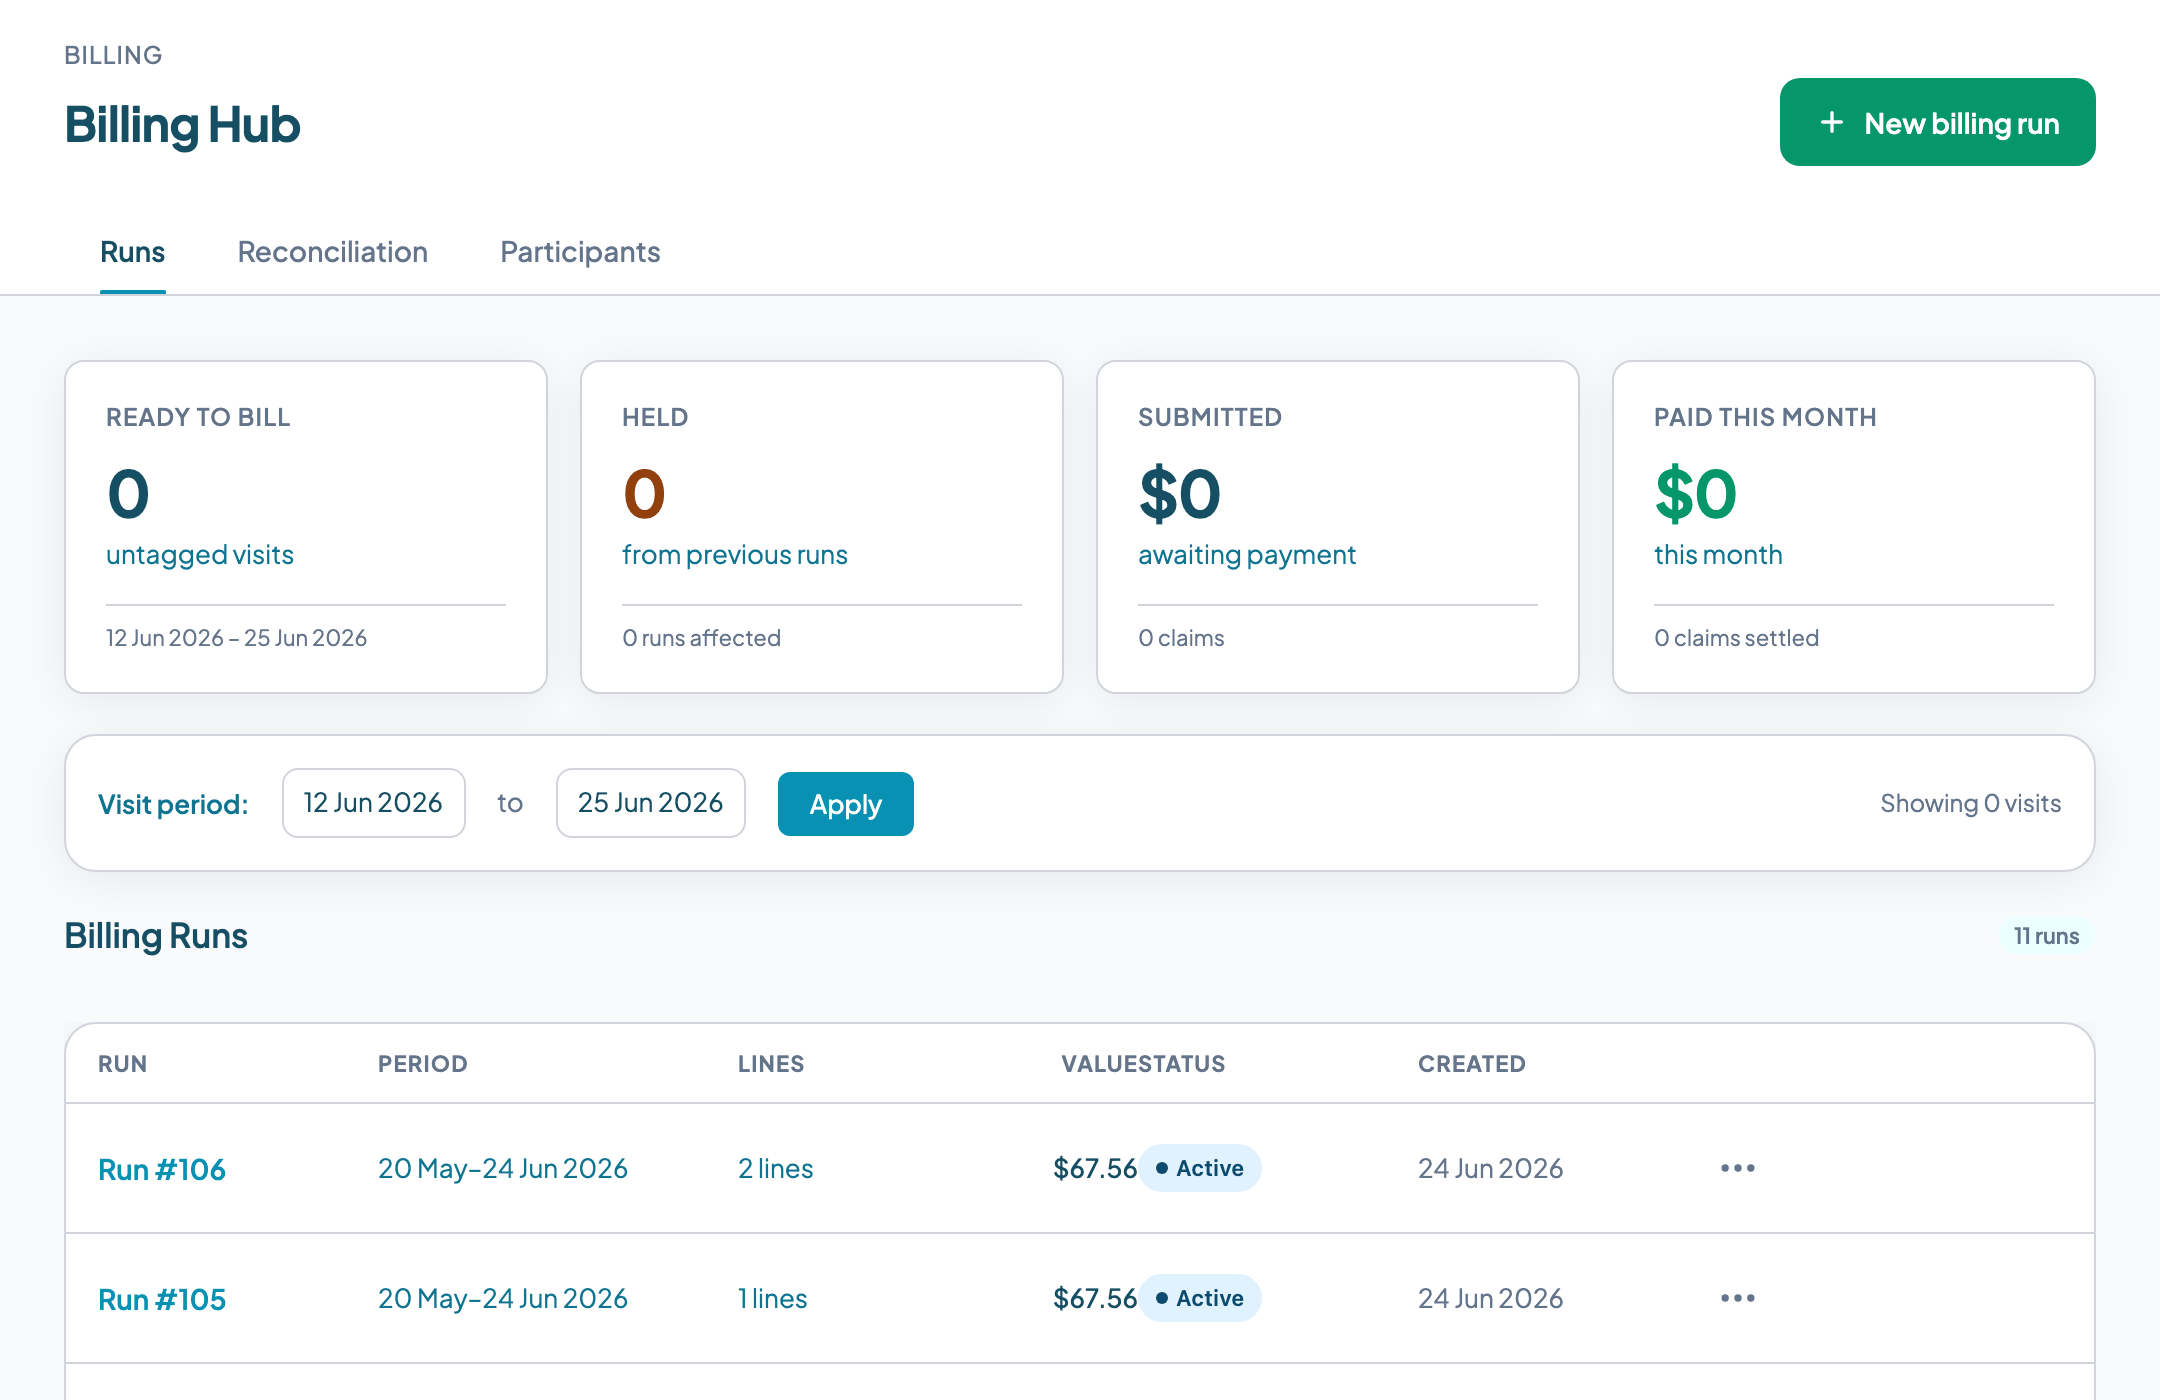
Step 3: Create a billing run
Go to Billing, then Billing Runs, and create a new run. You will be asked to select a date range. The run will pull in all verified shifts within that date range that have not already been included in a previous billing run.
The billing run screen shows each claim line with a status:
- Clean: the line passes all pre-submission checks and is ready to bill
- Held: the line has failed one or more checks and cannot be submitted until the hold is resolved
- Warning: the line has a condition worth reviewing but is not blocked from submission
Review the summary counts before proceeding. A run with a large number of held lines usually indicates a systemic setup issue -- a participant with an expired SA, a support category not covered by any SA, or a batch of shifts with missing check-outs.
Budget tracking and near-limit warnings in Teiro currently apply to agency managed lines. For plan-managed and self-managed participants, budget visibility is managed through the plan manager or participant directly.
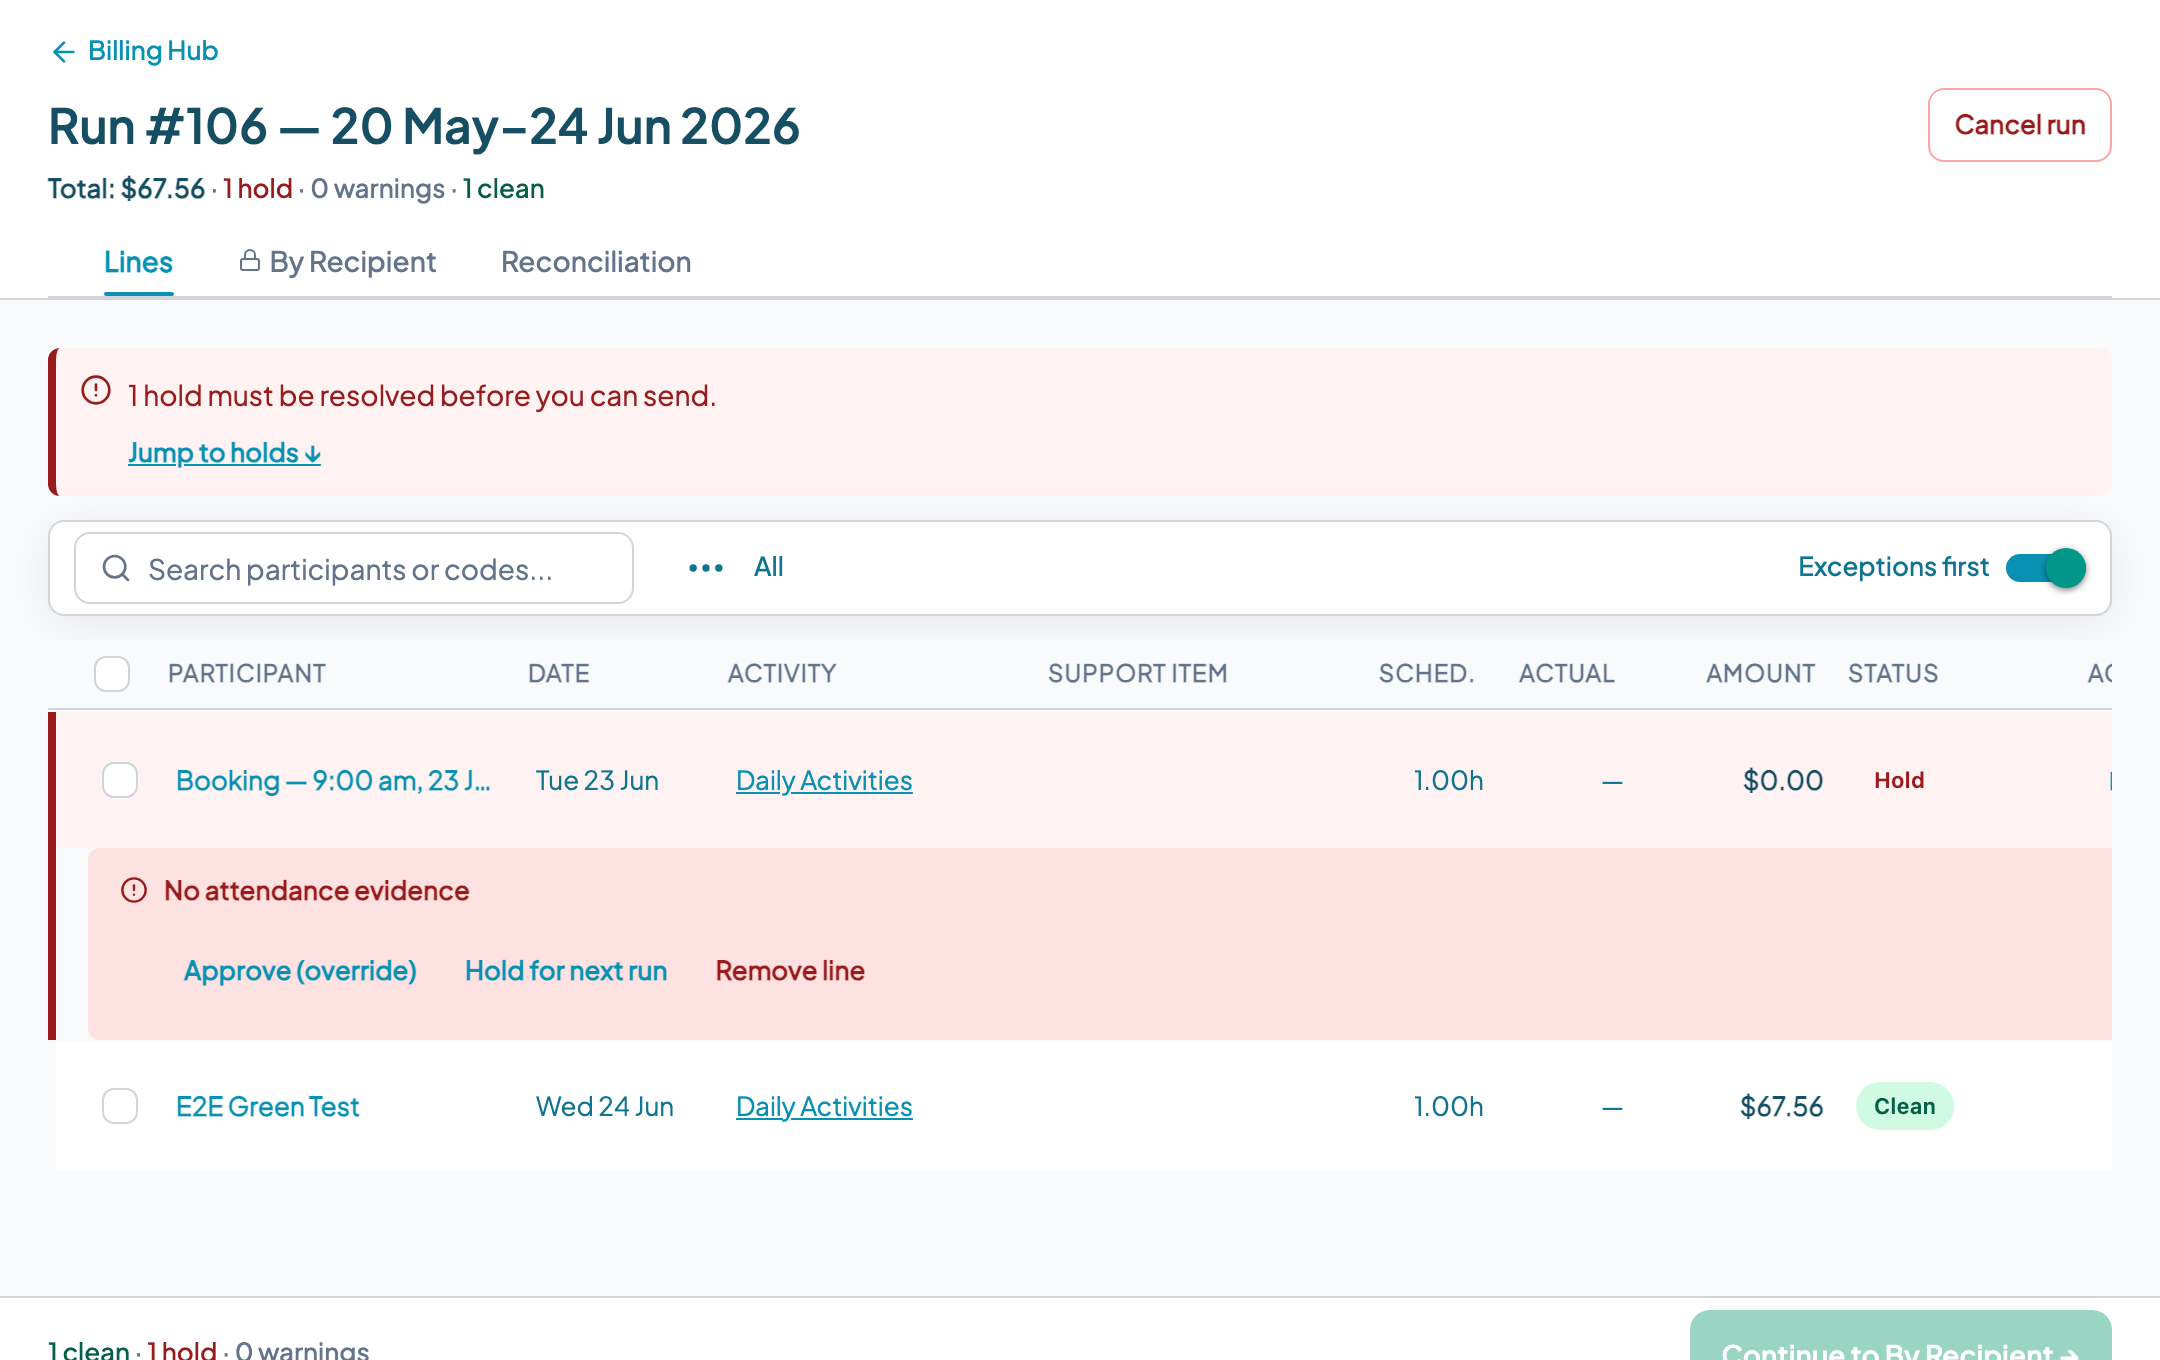
Step 4: Resolve holds
Held lines must be resolved before they can be included in a submission. Each held line shows the specific reason for the hold. The most common holds and how to resolve them:
No active service agreement. The participant has no current SA. Go to the participant record and create or extend the SA. Once the SA is active and covers the service date, the hold will clear.
No SA line covering the activity type. The SA exists but does not include a line item for the support category of this shift. Add the missing line item to the SA. If the support was genuinely not covered by the participant's plan, the line may need to be removed from the run rather than resolved.
No attendance evidence. The shift has no check-in or check-out record. If the service was definitely delivered, a coordinator can manually record attendance from the shift record. If the service was not delivered, remove the line from the run.
Expired worker screening at time of service. The worker's NDIS Worker Screening Check was expired on the date the shift was delivered. This hold cannot be cleared by adding a new check -- the issue is that the worker was unscreened at the time of delivery. Review your organisation's screening audit process. In most cases these lines should not be submitted.
Possible duplicate. Review whether this shift has already been billed in a previous run. If it is a genuine duplicate, remove it from the current run.
Cancellation not billable. The shift was cancelled but does not meet the NDIS short-notice cancellation rules. Teiro applies a 7 clear day notice window -- a cancellation is short notice if the participant gives less than 7 clear days before the scheduled start. The cancellation reason and participant circumstances must also meet the criteria in the NDIS Pricing Arrangements. If the criteria are not met, the line cannot be claimed.
Note: even valid short-notice cancellations are subject to a per-participant claiming cap under the NDIS Pricing Arrangements. Check the current Pricing Arrangements for the applicable limit -- claiming beyond this cap is a known compliance audit trigger.
Step 5: Review and group by recipient
Once holds are resolved, the billing run separates lines by funding type. Before exporting or sending anything, confirm that:
- Agency managed lines are grouped correctly
- Plan-managed lines are attributed to the correct plan manager (especially important if a participant has recently changed plan managers)
- Self-managed lines have a valid email address for the participant
Lines for the same participant but different management types will appear in separate output groups. This is correct -- mixed-management participants generate multiple billing outputs.
Step 6: Send invoices (plan-managed and self-managed)
For plan-managed participants, Teiro generates an invoice addressed to the plan manager. Review the invoice to confirm the plan manager contact details, the support item codes, the service dates, and the amounts match your records. Send the invoice from within Teiro. The invoice is recorded in the billing run history.
For self-managed participants, Teiro generates an invoice addressed to the participant. Confirm the participant email address is current before sending. Once sent, the invoice status moves to Sent. When the participant pays, mark the invoice paid and record the payment date.
Step 7: Export the NDIA bulk payment CSV
For agency managed lines, use the Export button on the billing run to download the bulk payment request CSV. The file is named ndia_bulk_payment_{run_number}.csv and is formatted to the NDIA myplace portal specification.
Open the NDIA myplace portal and upload the CSV file under Payment Requests. myplace will return a confirmation or a batch-level error. If there is a batch-level error, see NDIS Bulk Payment Requests: Why Batches Reject for common causes.
Note: Teiro generates the CSV and you upload it manually. Teiro does not submit directly to myplace.
Step 8: Reconcile the payment
NDIA typically processes payment requests within 2-3 business days and returns a myplace upload results CSV. To reconcile:
- 1.Download the myplace upload results CSV from the NDIA myplace portal
- 2.Go to Billing, then Reconciliation in Teiro
- 3.Import the CSV
- 4.Teiro matches payment lines to submitted claims by provider claim reference
- 5.Review any lines where the paid amount differs from the submitted amount
- 6.Mark reconciled lines as paid
Lines that were paid in full move to Paid status. Lines with partial payments are flagged for review. Lines in the results file with no matching claim reference in Teiro need manual investigation.
For a detailed explanation of the myplace upload results CSV columns, see How to Read a myplace Upload Results CSV.
Troubleshooting FAQ
Why is a line on hold? Open the line detail to see the hold reason. Each hold has a specific cause listed. The most common are: no active service agreement, no SA line covering the activity type, and no attendance evidence.
What do I do when a participant has no SA? Create one before the billing run or remove that participant's lines from the current run. You cannot submit claims for a participant with no active SA.
What happens if I send the wrong invoice? If you have sent an invoice to the wrong plan manager, contact that plan manager immediately to advise the invoice is invalid. Create a credit note, void the incorrect invoice in Teiro, and resend to the correct recipient. Do not rely on the incorrect plan manager to simply ignore or return the invoice.
A participant changed plan managers mid-run. Which invoice goes where? Services delivered before the changeover date go to the old plan manager. Services after the changeover date go to the new plan manager. If your billing run spans the changeover date, you will need to split the lines manually.
Ready to set up billing for your organisation? Book a demo or sign up free for organisations with 5 or fewer active users.